Blog / Guides
How to build your first app in Zapbird
Install Zapbird, create a Flutter app and see your first change on a real phone in about 15 minutes. Every command is checked against the docs.
By the end of this guide you will have a Flutter app running on your own phone, and you will have changed its code and watched the phone update when you saved. It takes about 15 minutes. You do not need an emulator, Xcode, Android Studio or an account.
Zapbird is a command on your computer plus an app on your phone. The command compiles your Flutter project and sends it to the app over your Wi-Fi. This guide goes in the order you will do things, and every command in it comes from the documentation. If you want the thinking behind it first, read the introduction.
What you need
- A Mac or a 64-bit Windows PC with Flutter installed.
- Flutter 3.41.x (Dart 3.11). Step 1 shows how to check.
- A phone on the same Wi-Fi network as your computer.
- On Windows, Git for Windows. It includes OpenSSL, which Zapbird uses.
- A code editor you like. Any editor works.
You do not need a Zapbird account. There is no cloud service in the middle: the phone and the computer talk directly. The FAQ explains more.
Step 1: Check your Flutter version
Zapbird is built for Flutter 3.41.x. If you do not have Flutter yet, install it from the Flutter site first. Then check what you have:
$ flutter --version
$ flutter doctor
If the version is newer than 3.41.x, new projects get a newer Dart version that the Zapbird runner cannot compile yet. To stay on the right one, go to your Flutter folder and run:
$ git checkout 3.41.7
$ flutter doctor
Do not run flutter upgrade until Zapbird says it supports the new version. This is the single most common reason a first project fails, so it is worth checking now. If you are unsure later, the troubleshooting page has the same fix.
Step 2: Install the zapbird command
One line installs the command and the runner SDK, which is the set of compiler files that match the app on your phone. Pick your computer.
Mac. In Terminal:
$ curl -fsSL https://get.zapbird.dev/cli/install.sh | shWindows. In PowerShell:
$ irm https://get.zapbird.dev/cli/install.ps1 | iexOn Windows, open a new PowerShell window afterwards so the new PATH is picked up. If the installer cannot find OpenSSL, install Git for Windows and run it again. On an Apple silicon Mac you can use Homebrew instead (brew install Jago-Intelligence/zapbird/zapbird), and then run zapbird sdk install yourself.
Check that it worked:
$ zapbird --version
$ zapbird sdk list
The first line prints the version. The second lists the SDK that the installer put on your computer. If the installer could not download the SDK, run zapbird sdk install and try again. The install guide covers every option, including how to pick the SDK for one runner build.
Step 3: Install the Zapbird app on your phone
Install the Zapbird app on your phone and open it. In its Settings, turn on Trusted Flutter apps. Without it the app will not run a full Flutter project.
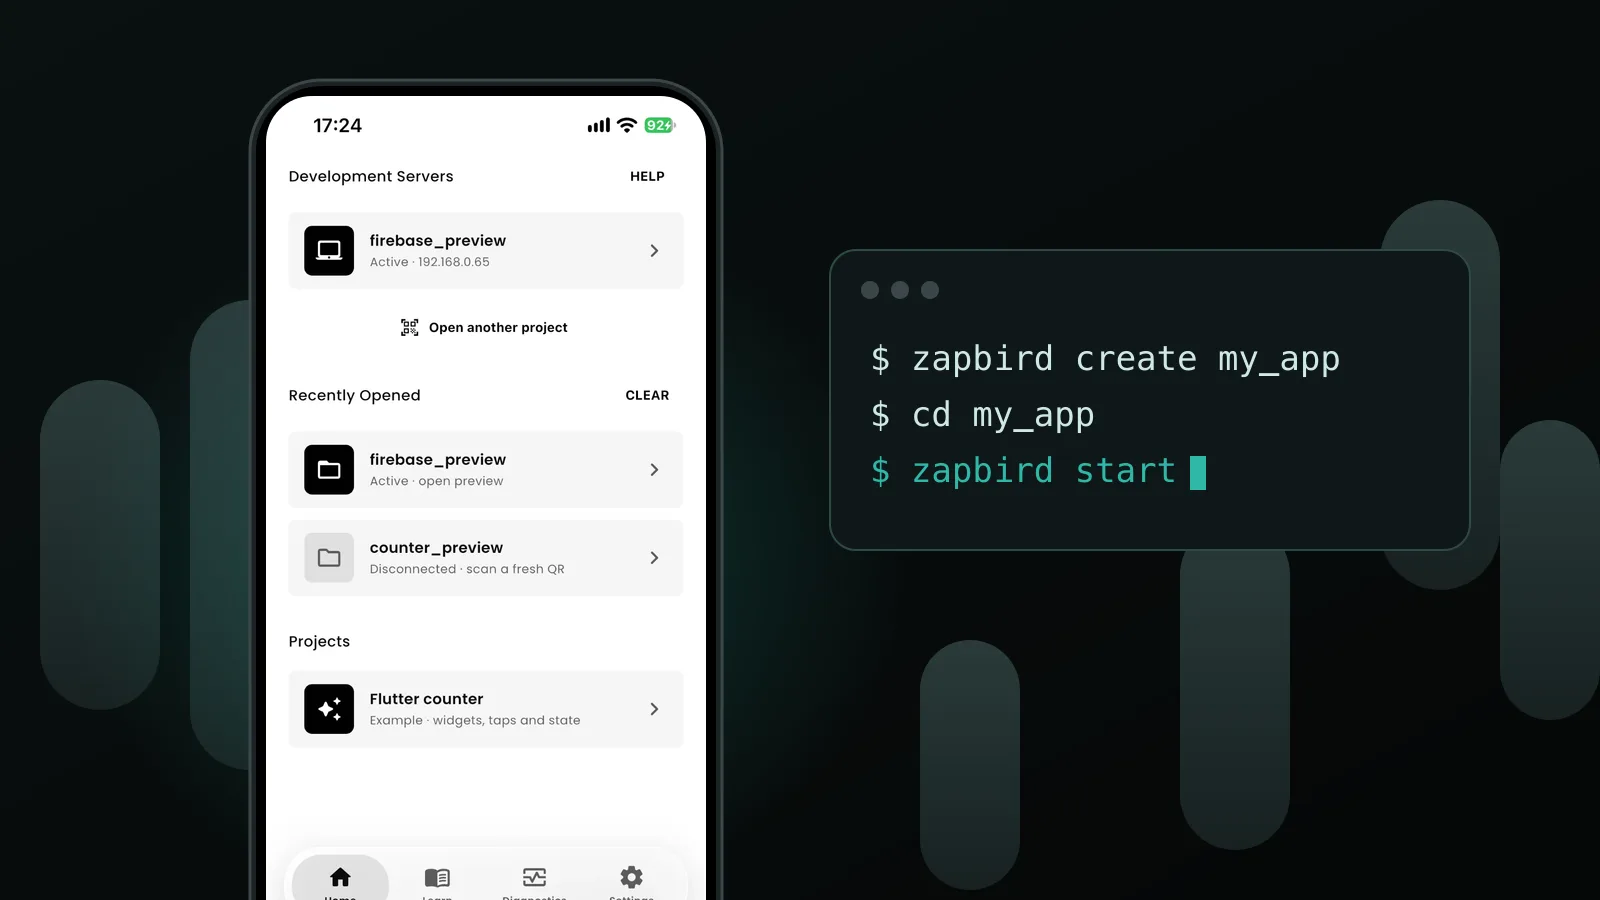
While you are there, look under About. It shows the build information of the app, such as the supported Flutter version. You do not need it for this guide, but it is the first thing to copy if you ever ask for help. The Zapbird app page describes the four screens: Home, Learn, Diagnostics and Settings.
Step 4: Create your project
Go to the folder where you keep your projects and run:
$ zapbird create my_app
$ cd my_app
This runs flutter create for you and then writes a file called zapbird.yaml next to the app. You get the standard Flutter starter app, the one with a counter and a button. If you plan to ship the app later, add your own app id prefix now with --org com.yourcompany. The command refuses a folder that already exists and is not empty. All the options are on the create command page.
Step 5: Check your setup with doctor
Before you start the server, ask Zapbird to check everything:
$ zapbird doctorDoctor looks at the network address, the project, Flutter, the SDK and your packages. Each line that is wrong says what is wrong and how to fix it. When everything is ready it exits with 0, and with 1 when something must be fixed. If it lists packages that differ from the runner, run zapbird doctor --fix. It changes the versions in pubspec.yaml, runs flutter pub get and prints every change it made. See the doctor command for what it checks.
Step 6: Start the server
Still inside my_app:
$ zapbird startZapbird compiles your app and prints a QR code in the terminal. Leave this terminal window open while you work. With the SDK installed it starts in bytecode mode, where every save reaches the phone by itself. Without an SDK it runs in kernel mode, which runs full Flutter and needs nothing extra, but there you press r to reload and R to restart.
The QR code and its link work for 24 hours while the server runs. Treat the QR code like a password: it holds a secret, so do not post a screenshot of it anywhere.
Step 7: Scan the QR code and approve the project
Open the Zapbird app, scan the QR code from the terminal, and approve the project when the phone shows its name. The terminal prints each phone that connects. Your starter app then appears on the phone.
If the camera cannot scan the code, choose Enter link in the app and type the address shown in the terminal. The phone then shows a 6-digit code. Type that code in the terminal to allow the phone, or type n to refuse it. Typing y does not allow a phone: only the matching code does. Connect your phone explains every way to pair.
Step 8: Make your first change
Open lib/main.dart in your editor. Near the top you will find the colour the app is built from:
colorScheme: .fromSeed(seedColor: Colors.deepPurple),Change Colors.deepPurple to Colors.green and save the file. Look at your phone without touching it. The app bar and the button should change colour on their own, and the counter should keep working.
Now change the text. Find the line that sets the home page title and give it your own words:
home: const MyHomePage(title: 'My first Zapbird app'),Save again. The title on the phone changes. If a change cannot be applied while keeping the app state, the app restarts from its first screen. That is expected for some edits. If you are in kernel mode and nothing moves, click into the terminal, type r and press Enter.
Your own project may look a little different from the lines above if Flutter has changed its starter file. The idea is the same: change a colour or a word, and save.
Step 9: Break it on purpose
The best way to trust a tool is to see it fail. Delete a closing bracket in lib/main.dart and save. The error appears on the phone with the file and line, and the same message prints in your terminal with keys, tokens and passwords hidden. Tap a line on the phone to open it in your editor.
Notice that the phone keeps showing your app. A compile error never replaces the last working version. Put the bracket back, save, and the app updates again. Keep the session moving describes how errors and reconnecting work.
Step 10: Stop, and come back tomorrow
When you are done, press Ctrl+C in the terminal. The server and the file watcher stop. Next time, go to the project folder and run zapbird start again. The Home screen of the app keeps your last ten projects. If the server is off, tapping one asks for a fresh QR code, which you get by starting the server again.
What happened when you pressed save
Four things, each simple. The file watcher on your computer noticed the change. The server compiled your project to bytecode, using the SDK. The phone downloaded the new code and checked it before using it. The app applied the change, and kept its state where that was possible.
The phone gets compiled code and your assets, not your source files, unless you start with --allow-phone-edit. How Zapbird works goes through the flow, and Security says what stays on your computer.
If something does not work
Start with zapbird doctor. It finds most problems and says how to fix them. Then match what you see:
- `zapbird` is not found after installing. Open a new terminal window. On a Mac the command lives in
~/.zapbird/bin; on Windows in%USERPROFILE%\.zapbird\bin. - The QR code does not scan or has stopped working. Choose Enter link in the app, or type
pand press Enter in the terminal for a new code. A new code ends the old one. - The phone will not connect. Put the phone and the computer on the same Wi-Fi. If your computer has more than one network, pass the right address with
zapbird start --host <ip>. - The project does not run on the phone. Check that Trusted Flutter apps is on in the app Settings, and check your Flutter version as in Step 1.
- The runner on your phone updated. Run
zapbird sdk upgradeto get the SDK made for the new build. - Nothing changes when you save. In kernel mode, type
rand press Enter. In bytecode mode, look at the terminal for an error.
The full list, with more cases, is on the troubleshooting page. If you still need help, run zapbird doctor and zapbird versions, keep the output, and write to us from the support page. Do not send a QR code or a pairing link: they hold a secret.
Frequently asked questions
Do I need Xcode or Android Studio? No. Zapbird runs your project on the phone you already have, so there is no emulator to start and no native build to wait for. You still need Flutter itself.
Do I need an account? No. There is no Zapbird account and no cloud service. Everything runs on your own computer and network.
Which Flutter version do I need? Flutter 3.41.x (Dart 3.11). A newer Flutter writes a newer Dart version into new projects, and the runner cannot compile that yet. Step 1 shows how to stay on 3.41.7.
Do the phone and the computer have to be on the same network? By default, yes. If you turn on Tailscale on both, the phone stays connected on any network. You can switch that off with --no-tailscale.
Does my source code leave my computer? The phone receives compiled bytecode and your assets, not your source files, unless you start with --allow-phone-edit.
Can I publish the app to the App Store or Google Play from here? Zapbird is a development tool and does not review or approve your apps. Before a store release, your app needs its own permission entries. Prepare a store build shows how zapbird.yaml and zapbird release check help with that.
What to read next
You now have the whole loop: create, start, scan, edit, save. The next guide uses it for something real: adding Sign in with Apple to a Flutter app and testing it on a real iPhone. It is a good test of why a real device matters.
For the commands you will use every day, the quick start is the one-page version of this guide, and the start command reference lists every option, such as --dart-define for your own settings.
Flutter and the related logo are trademarks of Google LLC. Zapbird is not endorsed by or affiliated with Google LLC.